Scouting Wildlife in Dusty Conditions with the Mavic 3M
Scouting Wildlife in Dusty Conditions with the Mavic 3M: A Practical Field Tutorial
META: Field tutorial for using the DJI Mavic 3M in dusty wildlife scouting conditions, with cleaning steps, low-altitude workflow, multispectral planning, and precision data capture tips.
Dust changes everything.
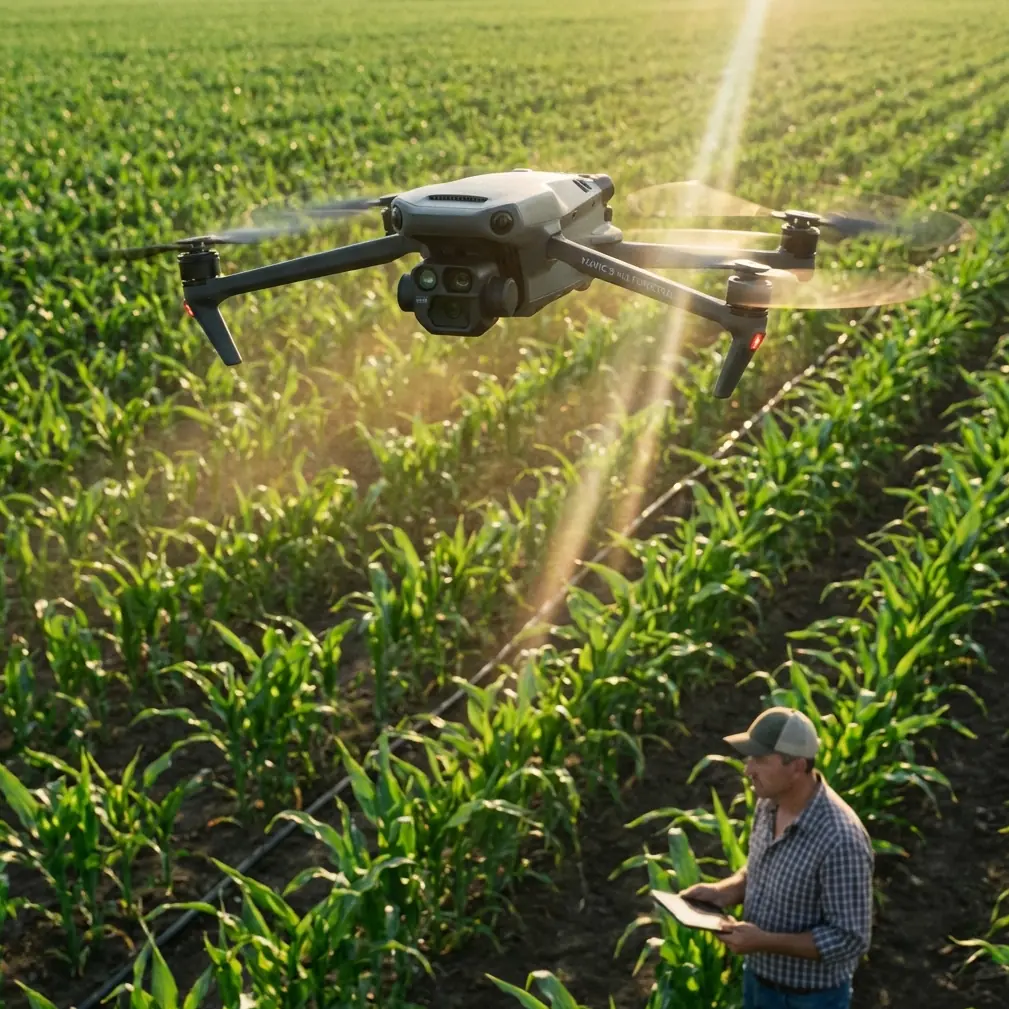
It gets into gimbals, coats sensors, softens contrast, and turns an otherwise routine wildlife scouting flight into a data-quality problem. If you are using the Mavic 3M in dry grassland, exposed soil, scrubland tracks, or agricultural edges where wildlife surveys often happen, the aircraft is only part of the equation. The real result depends on how you prepare, how low you fly, how carefully you manage imagery, and how clean your optics stay before takeoff.
That is where the Mavic 3M becomes especially interesting. Most people think about it first as a multispectral platform for vegetation work. In the field, though, the same strengths that matter for crop intelligence also matter for non-invasive wildlife scouting: repeatable route control, stable low-altitude image collection, real-time downlink for observers on the ground, and the ability to gather useful image data without forcing teams to walk every meter of rough terrain.
This tutorial is built around one specific challenge: scouting wildlife in dusty conditions without degrading safety or data quality.
Why dusty wildlife scouting is harder than it looks
Dust does not just make footage ugly. It creates three operational risks at once.
First, it reduces image clarity. That matters when you are trying to distinguish animal movement from brush, identify tracks near water access points, or compare habitat-use patterns over repeated flights.
Second, it raises collision risk. In field conditions with low shrubs, wires, poles, uneven ridgelines, and sudden elevation changes, any loss of visual clarity or sensor performance can stack up fast.
Third, it can corrupt your baseline. Wildlife scouting is often comparative. You are not only asking “what is there today?” You are asking whether this corridor is being used more than last week, whether heat stress is pushing animals toward irrigated edges, or whether a construction zone is changing movement patterns. If the aircraft launches with contaminated optics, the dataset starts compromised.
Older industry materials on UAV operations highlighted a useful point that still applies today: low-altitude drones gained traction because they can fly close to the ground, even terrain-following in complex environments, while transmitting image data in real time to a ground station. That combination matters in dusty wildlife scouting because it lets a small field team cover more ground with fewer foot entries into sensitive habitat. It also reduces the need to repeatedly disturb an area just to confirm what the aircraft could have documented from above.
Start with the pre-flight cleaning step most crews rush
Here is the field habit worth enforcing: clean before power-on, not after the warning appears.
In dust-heavy environments, I recommend treating pre-flight cleaning as a safety step, not a cosmetic one. The sequence is simple:
Move away from the launch plume zone
Do not unpack and clean right where you intend to take off. Vertical takeoff is convenient, especially in uneven ground, but it also kicks dust upward. Set up on a cleaner mat or case lid several meters away, finish checks, then move to the launch point.Inspect the multispectral and RGB optics first
Wipe the lens surfaces only with proper optical tools. Dust haze on the front element can flatten contrast enough to reduce the usefulness of both habitat interpretation and later stitching.Check downward-facing sensing areas and landing-related surfaces
Historical UAV guidance often emphasized precise landing capability, even noting descent precision down to around 40 cm in certain systems. That only works consistently when the relevant sensors are not obscured. In dusty wildlife sites, this matters on return because the aircraft may come home to a visually messy surface with loose dirt, dry grass, and variable texture.Inspect the gimbal cavity and body seams
Fine particulate around moving parts can create subtle stabilization issues. That matters because some legacy aerial-imaging systems relied on electronic dehazing, rain removal, noise suppression, and anti-shake processing to preserve usable imagery in poor conditions. Those features help, but they are not a substitute for a clean camera system.Clean controller screen and antennas
If you are relying on live observation for spotting movement under brush lines or along fence corridors, a dusty screen is a self-inflicted handicap.
That one cleaning routine does two jobs at once. It protects the aircraft’s sensing and stabilization behavior, and it gives your image set a cleaner starting point for later analysis.
Why low-altitude flight is a serious advantage for wildlife scouting
One of the most useful reference points from earlier UAV photogrammetry work is this: at 10 m above ground, operators were able to obtain clear imagery sufficient for measuring key linear infrastructure details, and low-altitude systems were cited as achieving precision better than 0.1 m in suitable conditions.
That reference came from engineering measurement, not wildlife work, but the operational significance carries over.
When scouting animals or habitat indicators in dusty country, low-altitude flying gives you three advantages:
- You reduce atmospheric clutter between sensor and subject
- You improve small-feature visibility, such as paths, bedding areas, edge disturbances, or water-source traffic
- You make repeat flights more comparable, especially if you are revisiting the same transect or corridor
The Mavic 3M is well suited to this style of work because it can collect repeatable image sets over compact areas without requiring a big field setup. Older UAV systems were praised for not needing airport-style infrastructure and for handling launches in varied terrain. That same practical mobility is exactly why compact mission-ready aircraft are so effective for wildlife teams working near dirt tracks, dry paddocks, rail easements, revegetation sites, or utility corridors.
The key is not to fly low just because you can. Fly low because the mission needs finer separation between animal sign, vegetation structure, and ground texture.
Build a route that respects both habitat and data consistency
Dusty conditions tempt pilots to improvise. Don’t.
A wildlife scouting mission works best when the flight path is repeatable. Historical UAV use cases described assigned routes, intelligent search behavior, real-time positioning, and real-time wireless communications as major advantages. In practice, that means you should define your search lanes before takeoff and keep them consistent over time.
For the Mavic 3M, a good wildlife scouting route usually includes:
- a perimeter pass to map disturbance and access points
- one or more habitat transects over likely movement zones
- focused low-altitude passes near water, shade lines, or crop boundaries
- a conservative return path that avoids dust plumes from nearby vehicles or exposed ground patches
If your workflow depends on RTK fix rate for repeatability and map confidence, verify that before you launch into the main run. Dust itself does not block RTK, but rushed field setup often leads crews to skip the few extra seconds needed to confirm a stable solution. If you are comparing wildlife activity week to week, centimeter-grade consistency is not a luxury. It is how you know apparent movement changes are ecological, not just positional drift.
Use multispectral data for habitat reading, not just plant maps
This is where the Mavic 3M separates itself from standard visual-only scouting.
Wildlife teams often focus on direct sightings. In dusty areas, that can be a mistake. Animals may be absent when you fly, but the habitat signal is still there. Multispectral data can help reveal moisture stress, vegetation vigor, edge contrast, grazing pressure, or recovery zones that explain where animals are likely to concentrate later.
That matters most in landscapes where wildlife movement overlaps farmland or managed vegetation. Older agricultural UAV references emphasized matching the flying platform to different field types and crop characteristics, with ground systems calculating application patterns and coverage efficiency. Translate that logic into scouting and you get a better question: which habitat blocks are actually worth revisiting because the vegetation condition suggests feed, cover, or water-linked use?
For field consultants, this changes the mission from “spot the animal” to “understand the pattern.”
If you are crossing mixed land uses, terms like swath width and survey overlap matter just as much as camera quality. Too wide a swath and you lose local nuance in edge habitat. Too narrow and you waste battery on redundant coverage. In practice, aim for consistency rather than theoretical maximum area. Wildlife interpretation improves when each sortie produces comparable image geometry.
Dust, wind, and the hidden lesson from spray drift
The context for the Mavic 3M often overlaps with agriculture, so it is worth borrowing one lesson from that world: air movement near the ground has consequences.
Agricultural UAV guidance has long stressed coverage density, flight speed, and distance to crop canopy. One older benchmark cited spray operations at 3.5 m/s, with a 7–10 m working width and a minimum working height around 1.5 m above crops to improve deposition and reduce drift. That is spraying, not scouting, but the operational lesson is valuable: near-ground airflow can either preserve precision or ruin it.
In wildlife scouting, replace liquid drift with dust drift.
Rotor wash over loose soil can create a cloud that follows the aircraft into its own imaging path. The result is lower contrast, reduced visibility, and in some cases a false impression of animal disturbance. The fix is straightforward:
- avoid launching from powder-dry bare earth if there is a firmer nearby surface
- use slightly offset takeoff positions from the area you want to image first
- climb cleanly before translating over the survey block
- do not descend into your own dust plume on landing
If your team also works in agricultural landscapes, this is the same mindset behind spray drift control and careful nozzle calibration: precision starts with managing what the aircraft itself puts into the air. Here, the concern is not chemistry. It is visibility and data integrity.
Live observation still matters
One detail from earlier UAV operational models remains highly relevant: real-time image transmission to a ground station. That was described as a major benefit for both monitoring and observation, and it remains one of the strongest ways to make a wildlife flight more effective.
Why? Because a second observer often sees what the pilot misses.
In dusty habitat, subtle movement at the edge of shrubs or along a fenceline may only appear for a second on the live feed. A ground observer can mark that location, note wind direction, and decide whether a second pass makes sense. This is especially useful when trying to avoid multiple entries into sensitive areas. The aircraft does the looking; the team makes decisions from the downlink.
If you are refining a mission profile for this kind of work and want a quick field-oriented discussion, you can message a Mavic 3M workflow specialist here.
A practical flight sequence for dusty wildlife sites
Here is the workflow I recommend.
1. Site read before unpacking
Look at the surface, not just the sky. Loose topsoil, dry dung, crushed grass, vehicle tracks, and exposed berms all predict dust behavior during takeoff and landing.
2. Pre-flight clean
Use the cleaning routine above. This is the step most likely to save both the sortie and the dataset.
3. Confirm positioning and mission geometry
Check satellite status, mission boundaries, overlap, and RTK behavior if used. Repeated scouting depends on repeatable geometry.
4. Vertical takeoff from the cleanest viable spot
A major practical benefit highlighted in earlier UAV references was freedom from strict terrain and airfield limits, including one-button takeoff and recovery. In wildlife work, that means you can operate from compact clearings instead of forcing a long walk into habitat.
5. First pass: higher overview
Use the first leg to understand dust movement, wildlife response, and any unexpected obstacles.
6. Second pass: lower, slower, targeted
This is where multispectral and visual detail become most useful. Keep the route disciplined.
7. Watch the live feed for behavior, not just bodies
Tracks, congregation zones, trampled entries, stressed forage, and water-edge patterns often tell the story better than a single sighting.
8. Return with a clean landing plan
Avoid coming straight down through visible airborne dust. Choose the firmer recovery spot even if it means a slightly longer final approach.
9. Post-flight clean before packing
Dust left in place during transport becomes abrasion.
What actually makes the Mavic 3M useful here
Not every drone is equally helpful in dusty wildlife scouting. The Mavic 3M earns its place when you need three things at once:
- compact deployment in uneven field conditions
- repeatable low-altitude data collection
- more than just conventional visual footage
The older source material repeatedly emphasized features that still define successful field operations today: low-altitude access, real-time transmission, quick deployment without major launch infrastructure, and practical work in less-than-ideal weather such as light haze or overcast conditions. Add multispectral capability and precise route repetition, and you get a platform that can do more than capture a scenic pass. It can support habitat interpretation with operational discipline.
That is the difference between flying over wildlife country and actually learning something from it.
When the site is dusty, the best results usually come from the least glamorous habit: cleaning the aircraft before takeoff, then flying a route designed to preserve image quality instead of fighting the environment. The Mavic 3M is strong enough for serious field scouting, but only if the workflow is just as serious.
Ready for your own Mavic 3M? Contact our team for expert consultation.