Filming Remote Solar Farms with the Mavic 3M
Filming Remote Solar Farms with the Mavic 3M: A Field Tutorial for Cleaner Data and Fewer Missed Defects
META: A practical Mavic 3M tutorial for remote solar farm work, covering multispectral workflow, exposure control, RTK stability, electromagnetic interference, and image quality pitfalls that matter in the field.
Remote solar sites punish sloppy workflow.
You feel it the moment you unload gear. Long panel rows reflect hard light into the aircraft. Substations and inverters can introduce electromagnetic noise. Wind sweeps across open ground. By midday, contrast gets ugly. Then the real trap appears: trusting automatic camera behavior when the scene is already difficult.
That mistake shows up everywhere in imaging, not just drones. A recent camera test across the Huawei Pura 70, Xiaomi 14 Ultra, iPhone 15 Pro, plus Halide and Moment apps, boiled “pro mode” down to three practical jobs: managing exposure, controlling focus, and handling shutter-related motion or blur. One night image shot at ISO 1600 showed obvious color noise when enlarged, a clear reminder that pushing sensitivity too far degrades image quality. The same test also found that auto mode often collapses in backlit portraits, fast-moving subjects, and handheld night scenes, producing dark faces, blur, and smeared lights.
That matters for the Mavic 3M more than many operators realize.
A solar farm is full of the exact kinds of situations where automation can make poor decisions. Backlit rows. High-reflectance surfaces. Repeating geometry that can confuse focus behavior. Heat shimmer. Occasional low-light starts or late-day runs. If your goal is useful inspection output rather than merely pretty footage, you need to think like an imaging operator, not just a pilot.
This tutorial is built around that principle.
Why the Mavic 3M is different on solar sites
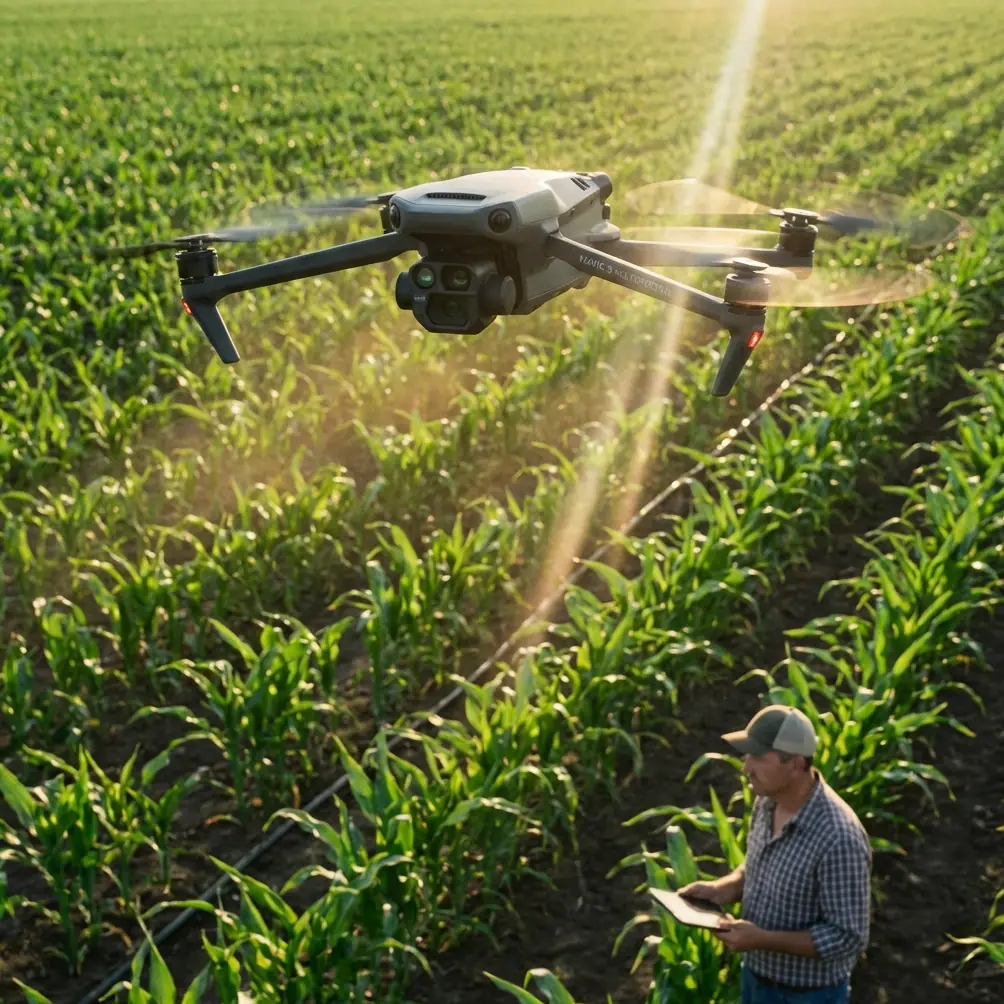
The Mavic 3M earns its place on utility-scale and commercial energy jobs because it is not just a camera drone. Its multispectral capability changes what “filming” means. On a solar farm, you may be collecting visual documentation for stakeholders, orthomosaic-ready mapping data for operations teams, and spectral information that supports vegetation management or site-condition analysis around the arrays.
That mixed mission creates friction. Cinematic instincts push people to rely on auto settings for speed. Survey instincts push toward consistency and repeatability. The Mavic 3M works best when those two worlds meet in a disciplined capture routine.
For remote solar work, the core objective is simple: preserve clean, consistent data across large areas while staying stable in an environment that can interfere with navigation and image quality.
Step 1: Stop letting auto exposure decide the job
The smartphone reference is useful here because it highlights a problem every experienced drone operator has seen. Auto mode often thinks it found a balanced image when the actual subject is compromised. In the phone example, a backlit face turned too dark while the bright background looked acceptable to the algorithm. On a solar site, the same logic can underexpose panel details or wash out surrounding ground features because the reflective rows dominate the metering.
With the Mavic 3M, exposure discipline matters for two reasons.
First, visible imagery used for inspection records needs consistency from pass to pass. If one flight line is darker than the next, your visual review becomes less reliable. Fine details around frame edges, cable runs, junction boxes, and row transitions become harder to compare.
Second, if you are generating map products, exposure inconsistency adds processing friction. Orthomosaic stitching and surface interpretation both benefit from predictable capture.
A practical field rule: expose for information, not for what looks dramatic on the controller screen. If reflected glare from the panels is clipping portions of the frame, slightly reduce exposure instead of letting auto chase brightness. You are trying to preserve usable texture and structure, not make the monitor look vivid.
The ISO 1600 example from the phone test is a perfect cautionary tale. Once noise starts showing up as visible color speckling when enlarged, image trust drops fast. On drone jobs, that “looks fine at first glance” failure is expensive. Zoomed review later may reveal that what seemed like minor grain actually masks dirt patterns, edge defects, or small condition changes near panel hardware. Keep ISO as low as the mission allows and solve exposure problems through timing, flight planning, and shutter strategy before you solve them with sensitivity.
Step 2: Treat focus as a deliberate setting, not a background process
The phone article’s second useful point was focus. Auto systems struggle when subjects move quickly or when the scene offers poor separation. Solar farms are not sports photography, but they do create their own focus problems. Repeating panel textures, high-glare zones, and long linear geometry can all tempt operators to assume the camera is “close enough.”
That assumption hurts data quality.
Before launching the first mapping segment or inspection pass, verify focus on a representative section of the array, not just on a high-contrast object near takeoff. Then lock in a consistent capture state as your workflow requires. The point is not to fiddle with settings endlessly. It is to avoid subtle softness across a long mission that only becomes obvious when engineering or operations teams start zooming into delivered files.
This is where the smartphone lesson translates directly: professional control is not about touching every parameter. It is about stepping in when automation is likely to make a bad choice.
Step 3: Control blur before it ruins your passes
The third takeaway from the reference material was shutter-related motion and blur. The phone examples mentioned fast-moving subjects and handheld night scenes producing smear and soft edges. Replace “running child” with “drone moving over repetitive panel rows in variable wind” and the lesson still stands.
Blur on a solar farm usually comes from one of four sources:
- Aircraft speed too high for the light available
- Shutter speed too slow for the wind and yaw corrections happening in flight
- Low-light starts or late finishes pushing the camera into weak settings
- Pilot inputs that are smooth for video but not stable enough for inspection capture
Even a well-stabilized platform cannot fully rescue poor shutter decisions. If you are collecting imagery over long rows, slight blur may not jump out during flight. Later, however, it shows up as softened edges on panel boundaries, unreadable small labels, and reduced confidence in site-condition interpretation.
In practical terms, if conditions force the camera toward slower shutter behavior, change the mission, not just the setting. Shorten the scope of that sortie. Wait for better light. Fly a more conservative segment. The goal is repeatable useful imagery, not simply completing the entire site in one attempt.
Step 4: Plan around remote-site electromagnetic interference
Now to the field problem that catches many crews on solar jobs: electromagnetic interference.
Remote solar farms may feel isolated, but electrically they can be noisy. Inverter stations, transformers, transmission infrastructure, and communication equipment can all affect the environment around your aircraft and controller link. This is where the “narrative spark” matters: antenna adjustment is not a cosmetic detail. It can decide whether your mission remains stable enough for precise data collection.
When link quality starts to fluctuate, many operators first blame distance. Often the real issue is antenna orientation combined with local interference sources. Adjusting controller antennas to maintain the strongest practical alignment with the aircraft can improve signal resilience, especially when you are skirting structures or flying near site equipment that complicates the RF environment.
Operational significance: this is not just about avoiding a warning message. Weak or unstable signal can interrupt clean mission execution, create hesitation in automated route confidence, and force unnecessary repositioning. On a mapping or inspection run, those interruptions can affect image overlap, timing, and ultimately the quality of the deliverable.
If your RTK fix rate begins to look inconsistent in a problematic section of the site, don’t just stare at the numbers. Step back and evaluate the environment. Move your pilot station if needed. Increase separation from likely interference sources. Reassess antenna angle. A stable RTK fix rate is tied to more than convenience; it underpins the centimeter precision that makes georeferenced outputs trustworthy on large solar assets.
Step 5: Use multispectral where it actually helps the solar operation
The Mavic 3M’s multispectral capability should not be treated as a novelty layer pasted onto a visual mission. On remote solar farms, it can support decisions around vegetation encroachment, drainage patterns near arrays, and land-condition changes that affect maintenance access or long-term site performance.
That means your workflow should separate “what looks good” from “what informs operations.” A glossy visible shot of endless panel rows may satisfy a progress update. Multispectral data, handled correctly, tells a very different story: where vegetation stress is changing, where growth may threaten access lanes, where water behavior may be shifting around infrastructure.
This matters because vegetation control and site-condition management are not side issues. They influence inspection access, maintenance efficiency, and safety of movement across the property. If your team also runs spraying operations on nearby land-management tasks, concepts like spray drift and nozzle calibration become relevant planning constraints around the broader site workflow, even if they are separate from the drone mission itself. The point is coordination. The Mavic 3M often sits inside a larger maintenance ecosystem, not in isolation.
Step 6: Match swath width and altitude to the output you actually need
A common mistake on solar projects is flying too broadly for detail work or too narrowly for site-scale efficiency. Swath width is not just a mapping term. It is the bridge between productivity and usable resolution.
If the mission is broad site documentation, you can optimize coverage. If the mission is defect-focused visual review of particular rows or structures, a narrower, more targeted approach is often the smarter choice. The Mavic 3M gives you the flexibility to serve both modes, but not in the same lazy flight profile.
Operational significance: wider capture can speed up acreage coverage, but if that choice forces compromises in clarity, overlap, or consistency, you may finish the flight and still fail the job. On remote sites, reflight costs time, daylight, and crew energy. The right swath width is the one that gets accepted by the downstream user on the first pass.
Step 7: Build a repeatable preflight imaging routine
Here is the short version I use when advising crews on Mavic 3M solar missions:
- Confirm mission objective: visual record, map, multispectral analysis, or mixed output
- Check light direction relative to panel rows and reflective surfaces
- Set exposure intentionally; do not trust the default preview
- Keep ISO restrained to avoid noise buildup, especially in early or late light
- Verify focus on the actual working scene
- Choose a speed and shutter combination that protects detail
- Check RTK status before committing to the main run
- Watch for electromagnetic interference near electrical infrastructure
- Adjust controller antenna position before assuming range problems
- Review sample captures at usable zoom, not just thumbnail view
This routine sounds basic. It is not. It prevents the exact kinds of failures described in the smartphone reference: poor backlit handling, focus misses, and blur that auto mode happily allows.
A field note on weather resistance and remote practicality
When you are working remote energy sites, hardware durability matters in ways office planning never captures. Dust, occasional spray, and sudden weather shifts are part of the assignment. If your support equipment or site process includes washdown-adjacent areas or exposure to harsh conditions, teams often value systems built with serious environmental resilience. That is one reason ruggedness standards such as IPX6K come up in conversations around field operations more broadly, even though mission success still comes down to pilot judgment and capture discipline.
Remote work is rarely defeated by one dramatic failure. More often, it unravels through small avoidable mistakes.
The real lesson: pro control is intervention, not complexity
The most useful line buried inside that phone-camera reference was the idea that manual or professional mode is not there to make you act like a technician for its own sake. It is there to stop the device from misleading you when automatic decisions are wrong.
That is exactly how to think about the Mavic 3M on remote solar farms.
You do not need to obsess over every parameter on every pass. You do need to recognize when the environment is stacked against automation: harsh backlight on reflective panels, changing signal conditions near electrical equipment, low-light launches that tempt excessive ISO, and wind-induced motion that can quietly soften your files.
Operators who understand that difference deliver cleaner maps, more reliable inspection imagery, and fewer unpleasant surprises back at the desk.
If you’re building a site workflow and want a practical second opinion on mission setup, antenna positioning, or multispectral capture strategy, you can message Marcus directly here.
Ready for your own Mavic 3M? Contact our team for expert consultation.