Mavic 3M for Construction Sites in Extreme Temperatures
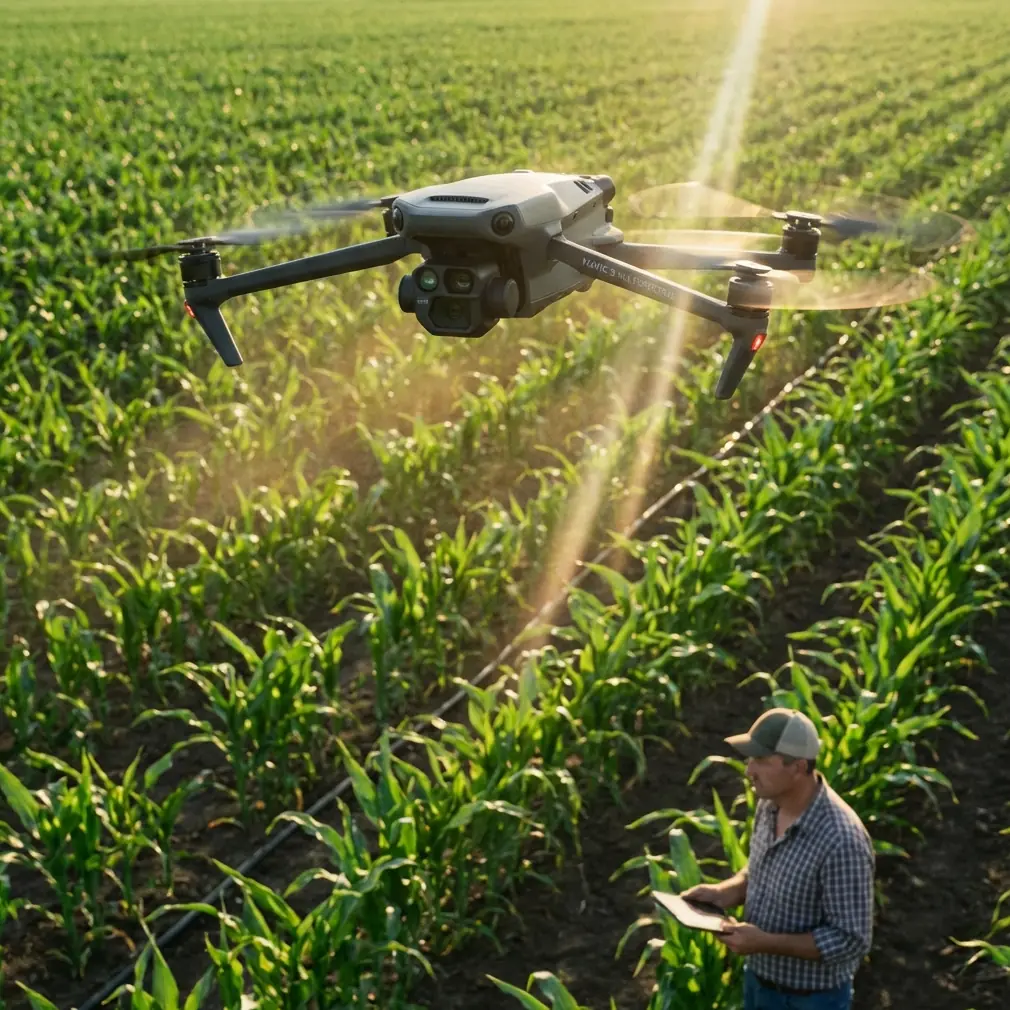
Mavic 3M for Construction Sites in Extreme Temperatures: A Field Tutorial on Exposure, Altitude, and Data Quality
META: Expert tutorial for using the DJI Mavic 3M on construction sites in extreme heat and cold, with practical guidance on flight altitude, exposure control, RTK reliability, multispectral capture, and image quality.
Construction sites punish weak workflows. Steel glare at noon, concrete dust in the air, reflective membranes on rooftops, long winter shadows, and temperature swings that change battery behavior by the hour. If you are flying a Mavic 3M in those conditions, the challenge is not simply getting airborne. It is getting imagery that holds up when decisions depend on it.
That is where a surprising piece of recent camera advice becomes relevant. A photography note published on March 22 pointed out a problem most operators know instinctively but rarely address directly: when people rely on automatic shooting modes, images often come back gray, blown out, or soft. The remedy was simple and technical at the same time—take control of three parameters: ISO, shutter speed, and exposure compensation. That guidance was written about phone photography, not drones. Even so, the operational lesson translates cleanly to Mavic 3M work on construction sites, especially in extreme temperatures where lighting and atmosphere become less forgiving.
For Mavic 3M operators, this matters because bad exposure is not just a cosmetic issue. It can degrade edge definition, reduce confidence in inspection imagery, and create unnecessary variability in multispectral datasets. If the mission is documenting earthworks, checking drainage patterns, monitoring material stockpiles, or tracking thermal stress signatures indirectly through surface condition changes, consistency beats convenience every time.
Why this recent photography lesson matters for Mavic 3M pilots
The key takeaway from that March 22 report was not that manual settings are somehow more “professional.” It was narrower and more useful: low ISO preserves cleaner image quality, while high ISO introduces visible noise. The source gave concrete ranges, including ISO 50–100 in strong daylight and 400–800 in dark scenes, with a clear bias toward staying low whenever possible.
That principle is directly relevant to a Mavic 3M flying over a construction site at midday in desert heat or on a bright winter morning after fresh snow. In both cases, the camera system is dealing with high contrast. White roofs, reflective metal, pale aggregate, standing water, and glass can all trick automated exposure. If the aircraft chooses a higher ISO than necessary, you do not just get more grain. You also reduce the clarity of fine visual cues—hairline cracking, edge deformation, faint moisture staining, surface texture differences, and subtle material boundaries.
For construction documentation, low ISO is not an aesthetic preference. It is a data discipline.
The same source also emphasized shutter speed as the control that determines whether movement is frozen or smeared. It referenced practical values such as 1/60 to 1/125 second for static subjects and 1/500 second or faster for rapid motion. Again, that is not drone-specific advice, but it becomes highly relevant when flying a Mavic 3M in windy thermal conditions around active sites. Cranes are moving. Trucks are turning. Dust is drifting. Even if the terrain itself is static, the aircraft is never perfectly still, and gusts become more erratic in extreme heat over sun-loaded surfaces.
A multispectral mission can tolerate many things. Motion blur is not one of them.
Start with altitude, because altitude shapes everything else
If I had to choose one operating variable that most strongly influences Mavic 3M performance on construction sites, it would be flight altitude. Not because it is the only critical parameter, but because it drives image scale, swath width, motion sensitivity, and the number of sorties required.
For most construction mapping missions in extreme temperatures, a practical starting altitude is 45 to 65 meters above ground level. That band usually provides the best compromise between detail and efficiency for the Mavic 3M. Fly lower than that and you gain resolution, but you also narrow swath width, increase flight count, and expose the aircraft to stronger localized turbulence from structures, machinery exhaust, and radiating surfaces. Fly much higher and you cover ground faster, but you begin to lose the level of visual confidence needed for edge conditions, material transitions, and subtle anomalies.
Why this altitude band works well operationally:
- It keeps ground detail tight enough for progress tracking and site comparison.
- It limits the blur penalty from vibration and gusting compared with very low, slow flights near structures.
- It gives the RTK system a better chance to maintain stable geometry without forcing the aircraft into obstacle-heavy airspace.
- It balances multispectral coverage and spatial clarity, which matters when you are trying to compare vegetated berms, sediment control zones, disturbed ground, and paved surfaces in the same mission.
If the site has tall steel, tower cranes, or significant elevation change, treat 45 to 65 meters as the baseline and adapt locally. The right answer is not one altitude for the whole project. It is one altitude strategy for each risk zone.
Heat changes exposure behavior more than most pilots expect
Extreme heat produces ugly lighting. It flattens texture in one area while overdriving highlights in another. Midday summer flights over concrete and steel can create the exact failure modes described in the March 22 photography note: gray-looking files, overexposed patches, and soft-looking details that are often the result of poor parameter selection rather than poor optics.
This is where the low-ISO recommendation becomes operationally important. In harsh sun, start with the lowest workable ISO. The reported guidance of ISO 50–100 in strong light is sensible in principle for this kind of work because it protects detail and suppresses noise. On a construction site, that helps preserve the micro-contrast needed to interpret surface conditions.
Then use shutter speed aggressively enough to maintain crispness. If you are mapping in steady air, you may have room to optimize. If the aircraft is fighting convective bumps from hot rooftops or asphalt, prioritize a faster shutter. The phone-photography guidance cited 1/500 second or faster for rapid movement; for drone work in unstable hot air, that number is a useful mental threshold rather than a rigid rule. The exact value depends on aircraft speed, wind, and lighting, but the logic is solid: protect detail first.
Exposure compensation also deserves more attention than it usually gets. Highly reflective surfaces can push auto-exposure systems into bad decisions. On bright roofs or pale aggregate, a slight negative adjustment can preserve highlight structure that would otherwise disappear. In shadow-heavy scenes, the reverse may be true. The point is not to micromanage every frame. It is to avoid trusting automation blindly when the site itself is visually deceptive.
Cold weather introduces a different set of errors
In severe cold, the site often looks calmer than it is. The air can be stable. The light can be clean. But batteries sag, shadows lengthen, and low-angle sun exaggerates contrast. Snow, frost, or even light concrete dust can fool the camera into underexposing the working scene. Dark materials such as wet soil, bitumen, and heavy equipment then lose separation.
This is where understanding exposure compensation becomes critical again. The same recent photography source argued that technical control solves common image failures better than full reliance on auto mode. That is exactly the lesson for winter Mavic 3M sorties. If the scene is dominated by bright snow, frost, or reflective surfaces, the camera may try to darken everything. The result is a misleading record of the site. Slight positive compensation may be needed to restore tonal balance, but the adjustment should be tested, not guessed.
Cold also has a quiet effect on mission planning. Pilots often focus on battery warming and takeoff timing, which are important, but they overlook the downstream consequence: if the battery window is shorter than expected, they rush the mission. That leads to higher ground speed, less overlap discipline, and more tolerance for imperfect capture conditions. Data quality slips first, even before the pilot notices an endurance problem.
Multispectral capture is only useful when the visual workflow is disciplined
The Mavic 3M earns attention because of its multispectral capability, but construction operators can misuse that strength by assuming specialized sensors will compensate for weak field practice. They will not.
Multispectral outputs are only as reliable as the capture conditions and georeferencing behind them. On construction sites, this matters in several practical scenarios:
- Monitoring vegetated retention zones and erosion-control areas.
- Tracking disturbed soil conditions after major grading.
- Comparing site drainage behavior over time.
- Identifying stressed perimeter planting or environmental compliance zones.
- Distinguishing changing material conditions at a broader site scale.
If your RGB capture is inconsistent because ISO drifts too high, shutter speed slips too low, or exposure varies unpredictably from pass to pass, it becomes harder to interpret changes with confidence. That is especially true when teams are comparing datasets across weeks or across temperature extremes.
This is why RTK fix rate deserves equal billing with camera settings. Centimeter precision is not a marketing phrase in this context. It is the difference between a trusted repeatable dataset and a map that looks good until someone tries to align it with grading benchmarks or progress-control layers. When the aircraft holds a strong RTK solution, repeat flights become meaningfully comparable. If the fix rate is unstable, the resulting dataset may still be visually useful, but its analytical value falls fast.
For teams working around steel-rich environments, temporary structures, or signal-complicated urban jobsites, monitoring RTK behavior during mission execution is not optional. It is part of quality control.
A practical field setup for Mavic 3M in extreme temperatures
Here is the workflow I recommend for construction-site missions where accuracy and consistency matter more than speed alone.
First, choose altitude based on the decision you need to support. If the mission is broad progress mapping, begin around 55 meters and adjust from there. If the task involves finer visual detail on roof systems, facade interfaces, or drainage edge conditions, move lower selectively rather than flying the whole site too low.
Second, lock in an exposure strategy before launch. Do not let the first pass decide your entire dataset. In hard sunlight, keep ISO as low as conditions allow. The recent photography guidance specifically pointed to ISO 50–100 in strong light, and that logic is sound because low sensitivity protects clean detail. If the air is turbulent or the aircraft is moving quickly, raise shutter speed before you accept blur. Noise is sometimes manageable. Lost detail is not.
Third, watch overlap and swath width as a pair. Pilots often talk about them separately, but they are connected through altitude and speed. If you increase altitude to expand swath width and reduce total flight time in extreme heat, make sure you are not sacrificing the ground detail needed for the actual engineering question. Efficiency is only efficient if the deliverable remains usable.
Fourth, review samples on site. Not later in the office. Not after the client asks why reflective roofing areas look clipped or why stockpile edges appear soft. Zoom in on a few representative frames before committing to the full mission.
Fifth, in hot conditions, schedule around the surface rather than the clock. Two sites flown at the same hour can produce very different air behavior depending on roofing material, slab exposure, and nearby machinery. In cold conditions, schedule around shadow geometry and battery confidence, not just daylight availability.
If your team wants a quick field checklist tailored to this kind of mission profile, I can share one here: construction drone workflow notes.
Why the unrelated aviation design news still offers a lesson
The second news item in your reference set seems distant from drones at first glance. It reported that EDID signed with RoyalJet to design the interiors of 3 Airbus ACJ320neo business aircraft, building on previous collaborations in 2013 and 2016. On the surface, that has nothing to do with Mavic 3M operations.
But the operational lesson is surprisingly relevant: repeat success comes from trusted systems, not one-off brilliance.
That partnership was described as being rooted in innovation, craftsmanship, and a shared standard for experience. Strip away the luxury aviation context, and you have a useful model for drone work on demanding construction sites. The teams that produce dependable Mavic 3M outputs in extreme temperatures are not improvising every mission. They are building a repeatable method—stable altitude choices, deliberate exposure control, RTK discipline, overlap consistency, and environment-specific preflight decisions.
In other words, professionalism in aerial data capture looks a lot like professionalism in aircraft design. Process creates confidence.
Common mistakes that quietly damage Mavic 3M site data
The most common error is assuming the Mavic 3M’s intelligence will rescue a poor lighting window. It will not. Auto mode is convenient, but as the recent March 22 photography report made clear, it frequently produces gray, overexposed, or blurred results when the scene is visually difficult. Construction sites are visually difficult almost all the time.
The second mistake is flying too high in the name of efficiency. A wider swath width sounds attractive when temperature is draining batteries and crews want quick turnaround. But if the altitude strips out the detail needed to verify slope transitions, material boundaries, or surface irregularities, the mission has failed regardless of coverage speed.
The third mistake is treating multispectral as a separate specialty rather than an integrated capture workflow. The Mavic 3M performs best when RGB quality, RTK quality, and mission geometry are all managed together.
The fourth mistake is ignoring environmental interference. Wind near tall structures, thermal lift over sun-heated surfaces, and reflective glare from roofing membranes can all compromise image quality even when the aircraft itself appears stable in flight.
Final takeaway
For construction teams using the Mavic 3M in extreme temperatures, the smartest improvement is rarely a dramatic one. It is usually a disciplined adjustment: lower ISO in strong light, faster shutter when the air gets unstable, exposure compensation when surfaces become deceptive, and a flight altitude around 45 to 65 meters as the default starting zone for balanced site mapping.
That recommendation is grounded in the recent photography guidance that stressed control over ISO, shutter speed, and exposure compensation, and in the broader aviation lesson that repeatable quality comes from trusted methods sustained over time. One story gave us the camera logic. The other underscored the value of process and long-term discipline.
On a difficult jobsite, those two ideas belong together.
Ready for your own Mavic 3M? Contact our team for expert consultation.