Mavic 3M for Coastal Work in Low Light: A Practical Flight
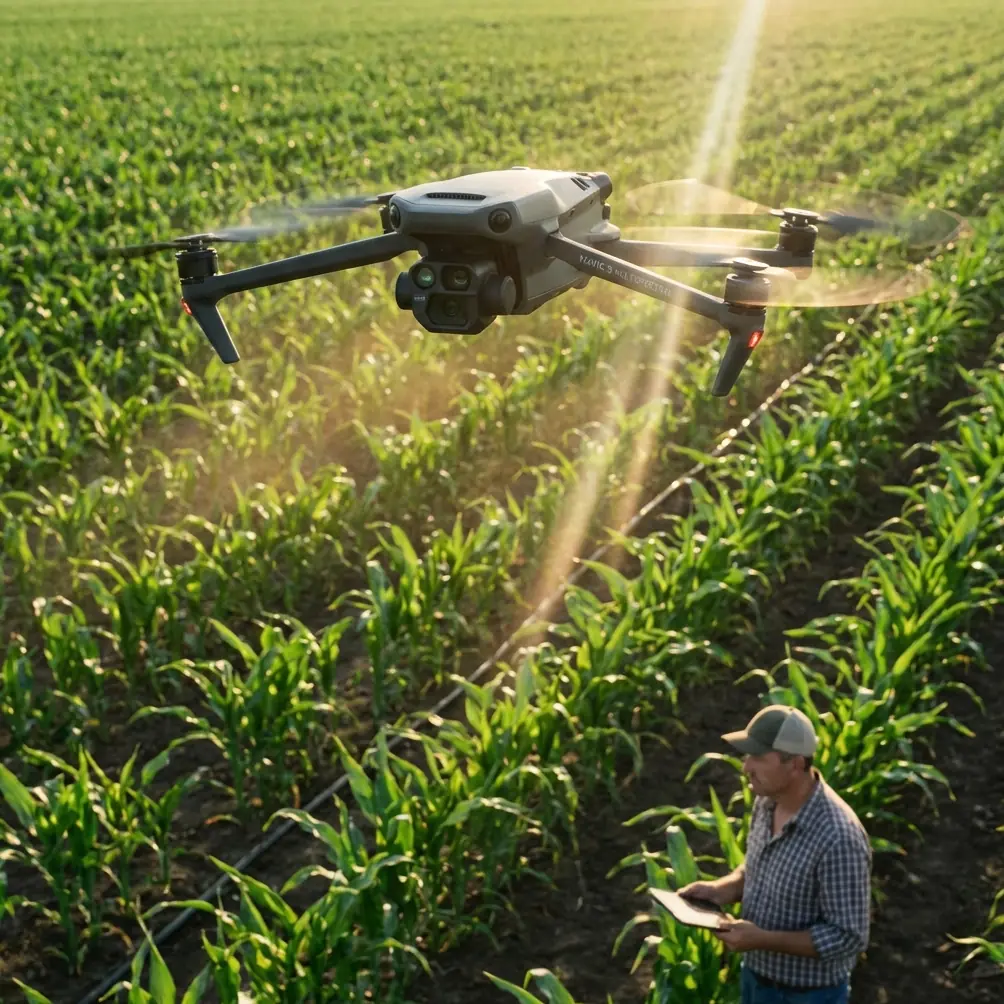
Mavic 3M for Coastal Work in Low Light: A Practical Flight Method That Starts Before Takeoff
META: A field-driven tutorial for using Mavic 3M on coastal missions in low light, with practical guidance on wind, visibility, battery management, framing logic, and precision workflow.
Low-light work along a coastline sounds straightforward until the aircraft is in the air.
The ground may feel calm. The launch area may look open. The waterline gives you a clean visual corridor. Then the aircraft climbs, the wind profile changes, and the mission starts asking harder questions. Can you still hold a reliable line? Is your visual read of the scene helping you, or fooling you? Are you spending battery on corrections instead of useful data?
That is where a disciplined Mavic 3M workflow matters.
The Mavic 3M is typically discussed through its multispectral payload and mapping value, but in coastal low-light operations, the bigger story is how you manage geometry, altitude, and energy under changing environmental conditions. The references behind this article are not Mavic-specific manuals. One is a simple photography lesson about leading lines and body extension. Another is a training note on small UAV wind safety and flight height. At first glance, they seem unrelated. In practice, they point to something experienced operators know well: in difficult light, safe and productive flying depends on how you use visual cues and how early you respect atmospheric change.
That is the frame for this tutorial.
Why coastal low-light missions go wrong
Coastlines are deceptive. They often provide excellent access and broad open terrain, but they also create transitional air. Near the ground, conditions may appear gentle. A training reference for a small educational drone makes a blunt point that remains useful even for professional operations: below roughly 10 meters, air can seem nearly calm, while above 10 meters stronger wind may already be present. The original recommendation was to keep actual flight height below 10 meters for that class of aircraft and to choose calm weather whenever possible.
You would not apply that exact altitude rule directly to a Mavic 3M mission profile. The aircraft category and mission purpose are different. The operational lesson, however, transfers perfectly: do not use surface comfort as your only wind assessment.
That single detail matters more on a coast in low light than many crews admit. When visibility contrast drops, pilots and observers begin relying on simplified visual references: shoreline edges, roads, barriers, boardwalk rails, revetment lines, stair runs, and dune paths. Those references are useful, but they can also encourage a false sense of stability if the aircraft is already working harder aloft than it appears from the ground.
The result is a familiar chain of inefficiency:
- more micro-corrections in flight
- reduced consistency in track spacing
- lower confidence in image overlap
- battery depletion that arrives earlier than expected
- pressure to “finish the line” instead of resetting cleanly
For a Mavic 3M operator, that is not just annoying. It directly affects multispectral consistency, RTK-dependent deliverables, and the repeatability of future flights.
The visual trick from phone photography that actually helps drone pilots
One of the reference items explains a portrait method using leading lines: benches, railings, roads, and stairs can direct a viewer’s eye toward the subject. The strongest effect comes when those lines enter diagonally from the edge of the frame toward the main point of interest. In portraiture, that makes a seated subject appear longer and more balanced.
For coastal Mavic 3M work, that same compositional principle becomes operational.
In low light, your eye needs structure. A straight shoreline is helpful, but diagonal converging references are often better because they reveal drift faster. If you launch from a seawall, promenade, jetty path, or stepped access point, look for hard linear features that cut into your field of view from the image edge rather than only running flat across it. Railings, curb lines, concrete seams, and breakwater geometry can help you judge whether the aircraft is crabbing, wandering, or holding line under crosswind.
This is especially useful during the first outbound leg of a mapping or inspection segment. When a line enters your visual field diagonally, small deviations are easier to see. The aircraft’s relationship to that line becomes a live cue for wind compensation. That means you are not just “seeing the drone.” You are seeing the drone against a directional reference.
The significance is practical:
- You identify lateral drift sooner.
- You reduce the lag between drift onset and pilot correction.
- You waste less battery fighting accumulated error.
- You preserve cleaner spatial logic for your final data.
This sounds almost too simple, but it is the same reason experienced pilots prefer missions in visually legible spaces. Strong geometry lowers cognitive load.
Build the mission around low-altitude truth, not optimistic assumptions
A second reference point worth carrying into Mavic 3M work is the reminder that wind and direction should be monitored continuously outdoors, not checked once and forgotten. Again, the source was an educational UAV document, but the principle scales upward.
For coastal low-light flying, I recommend a three-stage wind truth test before committing to a full block:
1. Read the surface, but distrust it
Observe vegetation, surf texture, moving sand, and flags if present. This gives you a first estimate only.
2. Fly a short vertical profile
Climb in controlled increments and watch aircraft attitude, ground speed consistency, and correction behavior. Do not just look at whether it “can hold.” Watch how much effort it takes.
3. Reassess the route against available battery
If the aircraft is burning more energy than expected at working altitude, shorten the block before the mission starts. This is where discipline saves time.
My field note on battery management is simple: on coastal evenings, I never treat the first battery as a production battery unless conditions are already familiar. I treat it as a calibration battery. Not for the sensors alone, but for the atmosphere. The few minutes “spent” validating wind, return path behavior, and visual legibility often prevent a rushed second half later.
That habit has preserved more usable data than any clever shortcut.
Why this matters for Mavic 3M specifically
The Mavic 3M earns its place when the output must be more than pretty imagery. Multispectral work depends on consistency. If your low-light coastal mission is tied to vegetation health along dune systems, shoreline rehabilitation zones, salt-tolerant planting, or drainage margins, then swath width and overlap discipline matter. So does your RTK fix rate. So does whether you introduced subtle route distortion because the aircraft was working against an underestimated lateral flow.
Readers often focus on sensor capability and forget flight quality.
Centimeter precision is not only a GNSS story. It is also a flight execution story. An RTK-enabled aircraft can only deliver clean positional value if the route itself is flown with stable intent. If your line spacing varies because you were late on drift correction, your downstream products feel that.
The same logic applies if your coastal assignment is not classic agriculture but environmental monitoring. Spray drift and nozzle calibration are usually discussed in crop operations, yet the underlying concern—how wind changes the meaning of your observations—is highly relevant on a coast. If you are using multispectral data to evaluate buffer vegetation or exposed edge conditions, you need confidence that your capture geometry and timing were not compromised by a shifting wind layer.
A practical low-light coastal workflow
Here is the method I teach for Mavic 3M shoreline work when daylight is thinning.
Step 1: Choose the launch site for geometry, not convenience
An open flat area is helpful, but not enough. The educational drone reference emphasizes a flat, open, safe site away from crowding, and that remains sound logic. For Mavic 3M, add one more filter: choose a launch area with readable linear references.
Promenade edges, sea walls, pathways, and stair alignments are more useful than irregular sand access points if light is dropping. You want clean visual anchors from the start.
Step 2: Keep the first climb diagnostic
Do not race to mission altitude. Use the climb to compare near-ground calm with working-height behavior. The “10 meters can change everything” lesson from the training material should stay in your head even if your actual mission proceeds higher. It is a reminder to detect the transition layer before the route depends on it.
Step 3: Set the first leg where you can judge it side-on
Another reference in the source material, though written for model aircraft aerobatic training, makes a sharp observation: maneuvers are easier to judge when flown in front of the operator at a suitable distance, where speed and level entry can be seen clearly. We are not borrowing aerobatic technique here. We are borrowing the viewing principle.
For your first productive leg, position the line where it is visually interpretable from your stance. If the route starts too far downrange or at a poor angle, drift diagnostics get harder. Good operators do not just ask, “Can the aircraft go there?” They ask, “Can I read it well from here?”
That decision improves safety and data quality together.
Step 4: Use diagonal references to confirm track holding
This is the phone-photography lesson repurposed. If a railing or path enters your field diagonally and points toward the area of operation, use it. You will notice crabbing and lateral offset faster than you would against a flat horizon alone.
Step 5: Watch battery as a wind instrument
Battery percentage is not only endurance. It is a diagnostic signal. If the first outbound line costs more than the plan predicted, trust that evidence. The coast will not negotiate with your spreadsheet.
My rule of thumb is to land early after the first serious line if the aircraft spent too much time correcting. Swap, shorten, and relaunch with a tighter objective. One clean block beats a full-area attempt with compromised overlap and a nervous return.
Step 6: Protect the return leg before you need it
In low light, people usually think about image quality first. I think about the return corridor first. Along coasts, the final minutes can be visually flatter than the launch phase, especially over water or wet ground. If the outbound track revealed a stronger wind layer aloft, leave margin for a controlled recovery rather than a maximum-coverage finish.
The underappreciated role of human posture and observer discipline
The portrait reference also describes a seated pose that creates extension: one leg forward, the other bent, torso slightly turned, chin raised. That advice is about making lines look longer in a phone image. It is not drone instruction. Still, there is a useful parallel for the operator and observer team.
Low-light performance is partly physical. Crews who remain twisted, cramped, or poorly oriented to the flight corridor read the scene less effectively. Face the route. Keep your body aligned with your observation zone. Do not bury your attention in the screen when the external geometry is doing critical work for you. The best low-light missions often look calm from the outside because the crew has reduced unnecessary movement and simplified what they need to interpret.
If your team is refining this workflow for recurring shoreline tasks, share your setup notes before the next sortie or message our field support here to compare mission assumptions against actual site conditions.
What separates reliable Mavic 3M coastal work from rushed flying
Not raw confidence. Not sensor specs alone.
Reliable work comes from understanding that the scene itself can be part of your navigation intelligence. A diagonal seawall, a stair edge, a road entering frame from the corner—these are not just background elements. In low light, they are operational tools. Combined with a realistic read of wind transition above the surface, they help preserve line discipline, battery margin, and usable multispectral output.
The Mavic 3M is fully capable of serious civilian coastal missions, but low-light success depends on procedure more than bravado. Watch for the altitude where the air changes. Use geometry that reveals drift early. Treat the first battery as an atmospheric briefing when needed. Protect your RTK-quality workflow by flying cleaner lines, not merely by expecting better data later.
That is how you turn a difficult shoreline window into a repeatable mission.
Ready for your own Mavic 3M? Contact our team for expert consultation.