Capturing High-Altitude Power Lines with the Mavic 3M
Capturing High-Altitude Power Lines with the Mavic 3M: A Field Case Study on Angle Discipline, Sensor Standoff, and Stable Flight Logic
META: A practical Mavic 3M case study for capturing high-altitude power lines, with flight altitude guidance, framing discipline, distance control, and reliability insights grounded in real technical references.
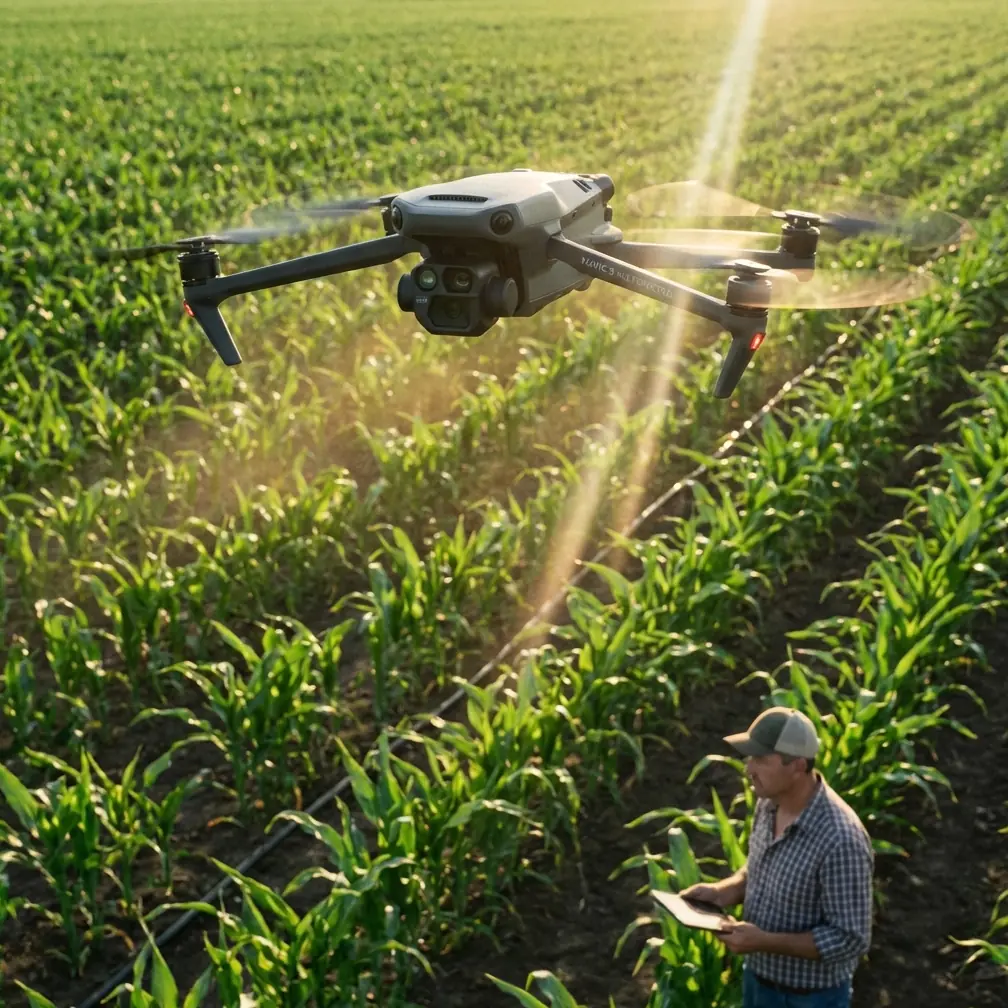
When people first think about the DJI Mavic 3M, they usually think of crops, vigor maps, and multispectral field analysis. That is fair. It was built with agricultural workflows in mind. But in the field, aircraft rarely stay inside the neat box that marketing departments draw around them. Teams adapt good platforms to adjacent jobs, and one of the more interesting civilian applications is visual documentation of elevated power infrastructure in rural corridors, utility easements, and hard-to-access transmission routes.
This article looks at a specific scenario: using a Mavic 3M to capture power lines at high altitude with clean geometry, dependable spacing, and repeatable results. Not as a generic “tips” list, but as a case study shaped by three unusual reference points: a photography note on 50mm lens discipline, an educational drone program that uses a front TOF trigger at 1200 mm and hovers at 155 cm to match eye level, and an ESC technical manual that emphasizes sync-loss prevention, automatic input detection, and a beacon after zero throttle.
At first glance, those sources seem disconnected. They are not. Together, they point to a practical truth about aerial power-line imaging: if your geometry is sloppy, your distances are inconsistent, and your control stack is unstable, your inspection images become harder to trust.
Why this matters for Mavic 3M users
The Mavic 3M is not a dedicated utility inspection airframe, and that is exactly why discipline matters more. When operators take a platform optimized for multispectral missions and use it for line documentation, they need a tighter method than usual. The margin for “close enough” shrinks. Power lines are narrow, reflective, elevated, and often visually confusing against bright sky or complex terrain. Small framing errors can make sag, spacing, conductor alignment, and hardware context harder to read in the final imagery.
That is where a surprisingly old-school camera lesson becomes useful.
The first operational rule: keep the lens plane honest
One reference source argues that many photographers abandon a 50mm lens because it does not feel dramatic enough, yet it becomes highly effective when the lens stays parallel to the subject. The warning is specific: even slight tilt can create visual discomfort, and correcting it later in post may damage image quality and distort proportions.
That principle translates directly to capturing power lines with the Mavic 3M.
When documenting conductors, crossarms, insulators, or attachment points, the aircraft should not simply “point at the line.” The camera orientation should be managed so the lens plane stays as parallel as possible to the target segment being recorded. For utility imagery, this matters for two reasons:
It preserves proportion.
If the aircraft is pitched or yawed carelessly relative to the line, the line can appear to bend or diverge in ways that are not physically real. That makes later review less reliable, especially when teams compare image sets across dates.It reduces salvage editing.
Trying to straighten a skewed capture afterward can crop out context, stretch towers or poles unnaturally, and weaken edge detail around thin conductors. With power lines, those thin edges are often the point of the image.
The practical takeaway is simple: do not let the gimbal and airframe drift into a lazy diagonal composition just because the scene feels readable on the controller display. On a large monitor back in the office, that drift becomes obvious.
Optimal flight altitude is not just “high enough”
For high-altitude power lines, operators often ask one question first: what altitude should I fly?
The wrong answer is a single number.
The better answer is this: fly at an altitude that lets the camera meet the line with minimal vertical convergence while preserving safe standoff and enough background separation to isolate the conductor visually. In practice, that usually means aligning the aircraft close to the elevation of the line or the hardware segment you are trying to capture, rather than shooting sharply upward from well below.
This is where the educational drone reference becomes unexpectedly useful. In that program, the drone climbs to 155 cm so it hovers roughly at the user’s eye level if the person is around 160 cm tall. The point is not the exact number. The point is the method: when the aircraft and the subject are on the same visual plane, interaction and perception become more natural.
Apply that same logic to power lines. If you want clean, legible imagery, the Mavic 3M should be positioned as close as practical to the target line’s vertical plane, not far below it. Shooting up from too low an altitude exaggerates angle distortion and compresses useful context. It can also place the conductor against blown-out sky, reducing contrast and making fine details harder to interpret.
A workable altitude framework
For high-altitude line capture, think in three layers:
Below-line positioning only when obstacle clearance or corridor restrictions require it.
Use this for broad context shots, not your primary documentation set.Near-level positioning as the default target for image quality.
This is usually the sweet spot for recording conductor runs, insulator strings, or attachment geometry with better proportional accuracy.Above-line positioning for selective overview work.
This can help when documenting corridor encroachment, vegetation relationships, or route context, but it is less suitable for preserving the natural look of the line itself.
If your purpose is detailed visual documentation rather than broad-area mapping, near-level shots usually produce the most useful records.
Distance discipline: the 1200 mm lesson scaled up
Another detail from the educational reference stands out: the front TOF logic treats movement within 1200 mm as a valid wave gesture and ignores anything beyond that range. Again, the raw number is not what matters for utility work. The operational significance is that the system only behaves predictably when the target stays inside a known detection envelope.
That is the same mindset Mavic 3M operators need around power lines.
Do not improvise standoff distances from image to image. Build a repeatable envelope based on your mission objective, environmental conditions, and the visual resolution you need. Inconsistent range produces inconsistent framing, and inconsistent framing makes comparison difficult over time.
For example:
- If you are documenting conductor condition along multiple spans, keep a stable lateral offset.
- If you are capturing hardware at support structures, repeat the same viewing geometry at each pole or tower.
- If the corridor includes varying terrain, adjust altitude to preserve subject relationship, not just AGL convenience.
The Mavic 3M’s mapping DNA is an advantage here. Operators who already think in terms of swath width, overlap logic, and centimeter precision can bring that discipline into corridor imaging. Even though this is not a classic multispectral crop mission, the habit of repeatability still applies.
What RTK-style thinking contributes, even when the mission is visual
The reader context mentions RTK fix rate and centimeter precision. That is not trivial. In power-line capture, the benefit of RTK-oriented workflow is not limited to maps. It helps operators return to the same corridor position, recreate the same angle, and compare images with less ambiguity.
For utility asset managers, consistency is often more valuable than a single striking image. A beautiful one-off shot is pleasant. A repeatable image set that allows year-over-year comparison is operationally useful.
This is one reason the Mavic 3M has more value in this scenario than many pilots first assume. Its agricultural and survey-oriented strengths train crews to care about geometry, route planning, and measured repeatability. Those habits transfer well to transmission and distribution corridor documentation.
Stability is not glamorous, but it is everything
The ESC manual in the reference set includes three details worth paying attention to:
- support for sync-loss prevention, especially relevant in multirotor applications
- automatic input detection on power-up
- a beacon function after a period of zero throttle
Those are not camera features, but they reveal a bigger operational principle: reliable aerial results depend on a stable control chain underneath the image payload.
In a high-altitude power-line environment, that principle matters because image quality is often lost before the shutter is pressed. Small attitude corrections, micro-oscillation in wind, and hesitant control response can all ruin line geometry. Thin subjects punish unstable flight. A crop canopy can hide a little wobble. A suspended wire cannot.
For Mavic 3M operators, the lesson is to treat aircraft health and control smoothness as part of the imaging workflow, not a separate maintenance concern. Before a utility corridor mission, verify the platform is behaving predictably at hover, during slow lateral motion, and in incremental yaw adjustments. The reference manual’s focus on preventing sync loss is a reminder that small disruptions in multirotor control become visible fast when your subject is long, narrow, and unforgiving.
The beacon note also has a civilian field relevance. In rough terrain near power corridors, audible recovery logic can save time if an aircraft lands off-route or in dense vegetation after a mission interruption. That is not a glamorous spec. It is the kind of practical detail operators remember only after they need it.
A real-world capture method for elevated lines
Here is the workflow I would use in this case study with a Mavic 3M team documenting high-elevation line sections in a rural utility corridor.
1. Establish the mission type before takeoff
Decide whether the flight is for:
- corridor context
- conductor documentation
- attachment and hardware review
- vegetation relationship
- repeatable archive imagery
Each objective changes the best altitude and camera relationship. Too many poor missions happen because pilots try to get every shot type in one improvised pass.
2. Match altitude to the subject, not the terrain alone
Do not rely on a fixed mission altitude if the line climbs or dips across uneven ground. The reference lesson from the 155 cm eye-level hover is useful here: visual clarity improves when aircraft and subject are on the same plane. In utility work, that means adjusting toward line height whenever safe and appropriate.
For many line segments, your best documentation pass is neither dramatically low nor excessively high. It is level enough to preserve the natural relationship of components.
3. Keep the camera parallel to the line segment being recorded
This is the strongest transferable lesson from the lens reference. If the conductor run is the subject, align to it. If the insulator string is the subject, align to that. Slight tilt may feel harmless in the field, but later correction can compromise proportions. With wires and structural components, those proportion changes are not cosmetic. They affect interpretability.
4. Use a repeatable standoff envelope
Borrow the logic of the 1200 mm detection threshold from the training drone concept: define a functional distance window and stay inside it. Your number will be much larger in utility work, of course, but the principle is the same. Consistent distance gives consistent scale.
5. Favor slow lateral movement over aggressive repositioning
Thin linear subjects reward gentle movement. Short pauses at capture points often produce cleaner results than trying to shoot continuously while correcting drift.
6. Save your multispectral mindset for corridor consistency
Even if the mission is RGB-led rather than crop analysis, the Mavic 3M’s multispectral heritage encourages route discipline. Think in passes, overlap logic, and revisitable geometry. That approach helps more than many pilots expect.
What to avoid
A few errors show up repeatedly in this kind of work.
Flying too low and shooting steeply upward
This often makes the line disappear into bright sky and exaggerates perspective.
Letting the aircraft yaw continuously during capture
The line may remain in frame, but the geometry changes too much from second to second.
Depending on post-processing to fix framing
As the photography reference warns, correction after the fact can distort the image. For line work, that can reduce value quickly.
Changing distance constantly without noticing
The human eye adapts on a small controller screen. Reviewers in the office will see the inconsistency.
Where operators usually need help
Most teams do not struggle with basic flight. They struggle with building a repeatable capture template for this exact use case. That is where short technical consultation saves time. If you are refining a Mavic 3M workflow for utility or corridor documentation, you can message our field team here to compare altitude logic, line-of-sight framing methods, and repeat-pass setup.
The core insight
The Mavic 3M can be useful for high-altitude power-line capture, but only when the operator treats geometry as a first-class variable.
The references behind this article all point in the same direction, even though they come from very different domains. A lens kept parallel to the subject preserves natural proportion. A drone set at eye-level demonstrates how matching the subject plane improves readability. A multirotor control system built to prevent sync loss reminds us that stable aircraft behavior is foundational, not optional.
Put those together and the best altitude insight becomes clear:
For power lines, the optimal flight altitude is usually the one that lets the Mavic 3M observe the target line as close to level as practical, at a controlled and repeatable offset, with minimal tilt correction required later.
That is not flashy advice. It is the kind that quietly improves every image in the mission.
Ready for your own Mavic 3M? Contact our team for expert consultation.