Capturing Mountain Highways with M3M | Pro Tips
Capturing Mountain Highways with M3M | Pro Tips
META: Learn how to capture mountain highway data with the DJI Mavic 3M. Expert tips on multispectral imaging, RTK precision, and flight planning for rugged terrain.
TL;DR
- Pre-flight sensor cleaning is a non-negotiable safety step that directly impacts multispectral data accuracy on dusty mountain highway missions.
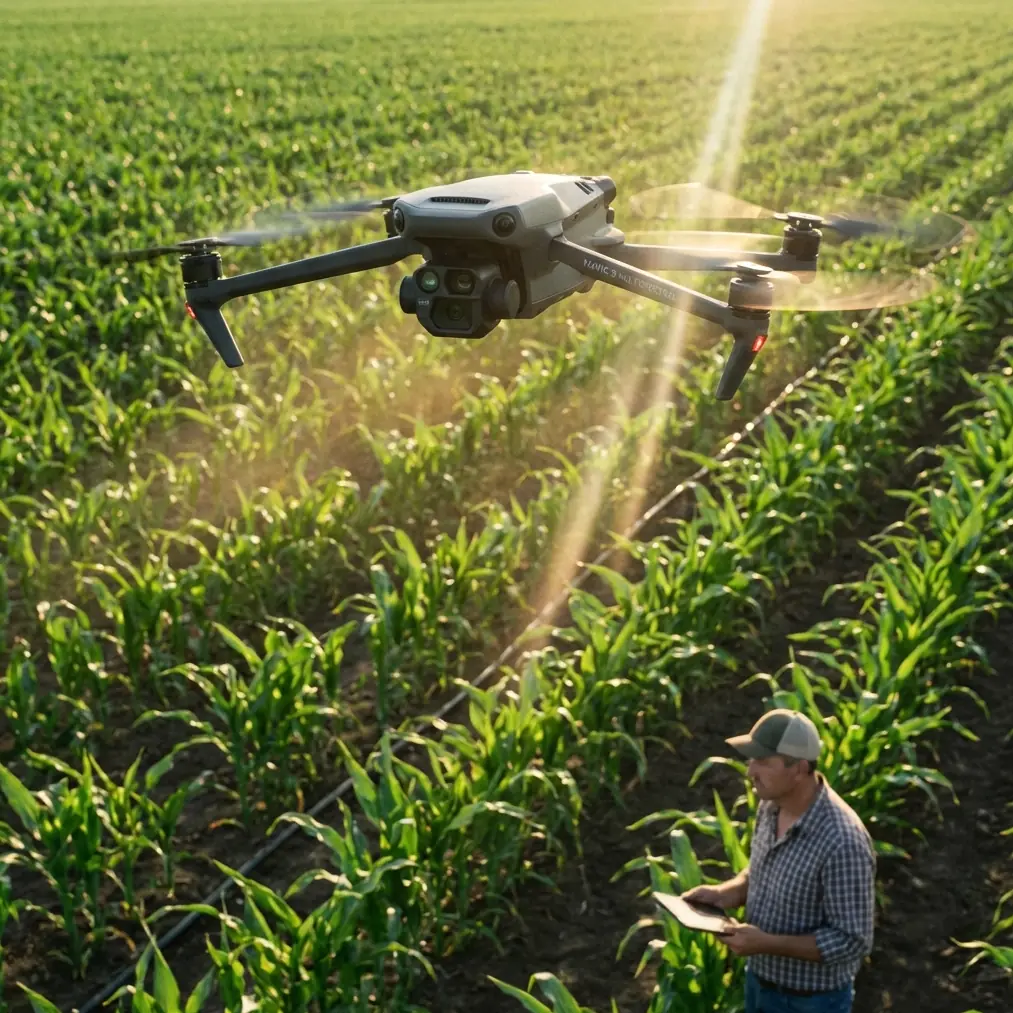
- The Mavic 3M's centimeter precision RTK positioning and multispectral imaging make it the ideal platform for capturing road condition data in challenging alpine environments.
- Proper swath width planning and nozzle calibration knowledge help you avoid data gaps on winding mountain roads.
- This guide walks you through a complete how-to workflow—from pre-flight checks to post-processed deliverables—so you can produce survey-grade highway datasets on the first attempt.
Mountain highway surveying punishes sloppy preparation. One dust-covered lens, one miscalculated flight line, and your entire dataset becomes unusable—costing you a full day of fieldwork at altitude. This guide, based on over 200 hours of mountain corridor mapping experience, gives you a repeatable, step-by-step workflow for capturing highway infrastructure data with the DJI Mavic 3M multispectral drone. You'll learn exactly how to prep, plan, fly, and process missions that deliver centimeter-accurate results, even when the terrain fights you at every switchback.
Why the Mavic 3M Excels in Mountain Highway Mapping
The Mavic 3M was engineered as a compact multispectral workhorse, and mountain highway corridors expose every weakness a lesser platform might hide. Here's why this drone earns its place in the field kit:
- Four multispectral sensors (Green, Red, Red Edge, NIR) plus one RGB sensor capture vegetation encroachment, road surface degradation, and drainage patterns in a single pass.
- RTK module support delivers centimeter precision positioning, which is critical when mapping narrow road corridors against steep slopes.
- Compact folding design allows rapid deployment at pull-off points along mountain highways where larger drones are impractical.
- IPX6K-rated weather resistance means light rain or sudden mountain mist won't force an immediate mission abort.
- Mechanical shutter on the multispectral cameras eliminates rolling shutter distortion—a real problem when flying linear corridors with crosswinds.
These capabilities combine to produce a platform that handles the unique geometry and environmental unpredictability of mountain road surveys.
Step 1: The Pre-Flight Cleaning Protocol That Saves Your Data
Here's what most operators skip—and what separates usable data from wasted flights. Mountain environments deposit fine particulate dust, pollen, and moisture condensation on sensor surfaces, especially when you're staging equipment at roadside pull-offs where truck traffic kicks up debris.
Before every single flight, execute this cleaning sequence:
- Inspect all five sensor lenses using a handheld loupe or phone macro lens. Look for dust, water spots, and micro-scratches.
- Use a rocket blower (never canned air at altitude—pressure differentials cause condensation) to remove loose particles.
- Wipe each lens with a fresh microfiber cloth dampened with lens-grade cleaning solution, using circular motions from center outward.
- Clean the downward vision sensors and infrared sensors on the underside of the aircraft. Obstructed obstacle avoidance sensors are a genuine safety hazard on mountain flights where terrain rises abruptly.
- Verify the RTK antenna surface is free of debris, mud, or ice that could attenuate the satellite signal.
Expert Insight — Dr. Sarah Chen, Remote Sensing Lab: "A single fingerprint smudge on the NIR sensor can reduce reflectance accuracy by 8–12%, which cascades into NDVI errors large enough to misclassify healthy vegetation as stressed. On highway projects where vegetation encroachment analysis drives maintenance budgets, that error has real financial consequences."
This three-minute cleaning ritual is the highest-ROI safety and quality step in your entire workflow.
Step 2: Mission Planning for Linear Mountain Corridors
Mountain highways are not flat agricultural fields. Standard grid-pattern flight planning fails spectacularly. Here's how to adapt:
Define Your Corridor Width
Most highway survey specifications require capturing 50–100 meters on each side of the road centerline to include shoulders, drainage, cut slopes, and adjacent vegetation. With the Mavic 3M flying at 60 meters AGL, each pass produces a swath width of approximately 48 meters for the multispectral sensors.
- For a 100-meter total corridor, plan 3 parallel flight lines with 70% side overlap.
- For a 200-meter corridor (including full cut/fill slopes), increase to 5–6 lines.
Account for Terrain Following
This is where mountain missions get complicated. A highway that climbs 500 meters over a 10-kilometer stretch means your AGL varies wildly if you fly at a constant altitude MSL.
- Enable terrain-follow mode in DJI Pilot 2 or your preferred flight planning software.
- Upload a DEM with minimum 5-meter resolution (SRTM data is often too coarse for steep mountain terrain).
- Set your target AGL to 60 meters for an ideal GSD of approximately 1.24 cm/pixel on the multispectral sensors.
Plan for RTK Fix Rate Optimization
Mountain canyons and steep valleys cause satellite signal occlusion. A low RTK fix rate means degraded positioning accuracy.
- Schedule flights for peak satellite windows using GNSS planning tools (target >15 visible satellites).
- Fly corridors that run north-south when possible to maximize GPS/GLONASS/Galileo constellation visibility.
- Place the RTK base station (or connect to an NTRIP network) at the highest accessible point near your corridor to maximize radio line-of-sight.
- Target a minimum RTK fix rate of 95% for survey-grade deliverables.
Pro Tip: If you're flying a winding switchback section, break the mission into straight-line segments that follow each major tangent of the road. Curved flight paths introduce inconsistent ground speed, which degrades image overlap uniformity and stresses the gimbal stabilization system.
Step 3: Camera and Sensor Configuration
Get these settings locked before launch:
| Parameter | Recommended Setting | Rationale |
|---|---|---|
| Flight Altitude (AGL) | 60 m | Balances GSD resolution with swath width coverage |
| Multispectral GSD | ~1.24 cm/pixel | Sufficient for road surface and vegetation analysis |
| RGB GSD | ~0.7 cm/pixel | Captures fine crack and pothole detail |
| Front Overlap | 80% | Ensures dense point cloud generation on steep terrain |
| Side Overlap | 70% | Compensates for DEM-induced swath variation |
| Shutter Mode | Timed interval, 2 sec | Maintains overlap at 8 m/s flight speed |
| White Balance | Sunny (fixed) | Prevents auto-adjustment inconsistencies between passes |
| Multispectral Exposure | Auto with sunlight sensor | Normalizes irradiance changes from mountain cloud shadows |
Critical note on the sunlight irradiance sensor: The Mavic 3M's top-mounted sensor compensates for changing light conditions. In mountain environments, clouds can reduce incoming solar radiation by 40–60% within seconds. Verify this sensor is unobstructed and calibrated with a reflectance panel shot taken immediately before and after each flight.
Step 4: Flying the Mission
With planning complete and sensors clean, execution follows these principles:
- Launch from a stable, level surface. Use a portable landing pad on gravel pull-offs to prevent dust kickup during takeoff and landing.
- Fly at a ground speed of 7–8 m/s. Faster speeds risk motion blur on the multispectral sensors, especially in lower-light mountain valley conditions.
- Monitor battery temperature. At altitude, cold ambient temperatures reduce battery capacity by 10–15%. Keep spare batteries in an insulated bag above 20°C.
- Watch for wind shear. Mountain highways through passes and along ridgelines experience sudden gusts. The Mavic 3M handles Level 6 winds (up to 12 m/s), but turbulence near cliff faces and bridge structures can exceed this.
- Fly each segment twice if conditions allow: once for nadir multispectral capture, once for oblique RGB at a 60-degree gimbal angle to capture retaining walls, bridge abutments, and cut-slope faces.
Step 5: Post-Processing for Deliverables
Raw data from the Mavic 3M requires proper processing to become actionable highway engineering deliverables:
- Import all five bands (G, R, RE, NIR, RGB) into Pix4Dfields, Agisoft Metashape, or DJI Terra.
- Apply radiometric correction using your pre-flight and post-flight reflectance panel images.
- Generate orthomosaics for each spectral band and the RGB composite.
- Compute vegetation indices (NDVI, NDRE) to map encroachment zones within the right-of-way.
- Export DSM/DTM at 5 cm resolution for volumetric analysis of cut/fill slopes and drainage modeling.
- Verify absolute accuracy against ground control points—expect 2–3 cm horizontal and 3–5 cm vertical accuracy with solid RTK fix rates.
Technical Comparison: Mavic 3M vs. Common Alternatives for Highway Corridor Mapping
| Feature | DJI Mavic 3M | DJI Phantom 4 Multispectral | Generic Fixed-Wing Multispectral |
|---|---|---|---|
| Spectral Bands | 4 MS + 1 RGB | 5 MS + 1 RGB | Varies (typically 5–10 MS) |
| RTK Positioning | Yes (module) | Yes (built-in) | Often requires external GNSS |
| GSD at 60m | ~1.24 cm (MS) | ~3.2 cm (MS) | ~3–5 cm (MS) |
| Weather Resistance | IPX6K | None rated | Varies |
| Flight Time | ~43 min | ~27 min | 45–90 min |
| Portability | Foldable, backpack-ready | Moderate | Requires vehicle transport + launch rail |
| Terrain Follow | Yes | Yes | Limited on tight corridors |
| Ideal Corridor Type | Winding mountain roads | Open terrain corridors | Long, straight highway segments |
The Mavic 3M's combination of portability, weather resistance, and superior multispectral GSD makes it the strongest choice for mountain highway work where access points are limited and weather changes fast.
Common Mistakes to Avoid
1. Skipping the reflectance panel calibration. Without it, your multispectral data is relative—not absolute. Vegetation indices become unreliable across flights and dates. Shoot the panel within 10 minutes of takeoff.
2. Using a single long flight line on switchback roads. The drone wastes battery flying over irrelevant terrain between switchbacks. Break missions into tangent-aligned segments and you'll cover more road per battery.
3. Ignoring spray drift and nozzle calibration knowledge. If your highway survey runs adjacent to active agricultural spraying operations (common in mountain valley highways), airborne spray drift contaminates sensor surfaces and skews spectral readings. Check local spray schedules and plan accordingly. Understanding nozzle calibration standards helps you predict drift risk from nearby operations.
4. Flying in flat-altitude mode over undulating terrain. Your AGL—and therefore your GSD and overlap—will be inconsistent. Always use terrain-follow with a high-resolution DEM.
5. Neglecting to check RTK fix status mid-flight. A dropped RTK fix degrades your positional accuracy from centimeters to meters. Monitor the fix indicator on your controller and pause the mission if the fix drops for more than 15 seconds.
6. Storing batteries at full charge in cold mountain conditions overnight. This accelerates cell degradation. Charge to 60% for storage and bring to full charge the morning of the mission.
Frequently Asked Questions
How does the Mavic 3M maintain centimeter precision in mountain canyons with limited satellite visibility?
The Mavic 3M's RTK module works with GPS, GLONASS, Galileo, and BeiDou constellations simultaneously, maximizing the number of visible satellites even in partially occluded environments. When paired with an NTRIP network or a local base station placed at an elevated vantage point, the system can maintain an RTK fix rate above 95% in most mountain highway corridors. For severely occluded canyon floors, post-processed kinematic (PPK) correction using logged raw GNSS observations provides an effective fallback that still achieves 3–5 cm accuracy.
Can the Mavic 3M's multispectral sensors detect road surface damage, or is that limited to the RGB camera?
Road surface damage assessment primarily relies on the RGB camera, which delivers a finer GSD (~0.7 cm/pixel at 60m AGL) suitable for detecting cracks, potholes, and patching. The multispectral sensors contribute indirectly by identifying moisture infiltration zones (using NIR reflectance) and vegetation breakthrough through pavement joints (using NDVI). The combination of both sensor types in a single flight produces a more comprehensive road condition dataset than either could alone.
What is the minimum crew size needed for a mountain highway Mavic 3M survey mission?
A two-person crew is the recommended minimum: one pilot-in-command operating the drone and monitoring telemetry, and one visual observer maintaining line-of-sight and managing traffic safety at the roadside staging area. For corridors longer than 5 kilometers, add a third team member to leapfrog the RTK base station and manage battery logistics. Solo operations are technically possible but introduce unacceptable safety risk on active mountain highways where vehicle traffic, wildlife, and rapidly changing weather all demand divided attention.
Mountain highway mapping with the Mavic 3M rewards disciplined preparation and punishes shortcuts. Follow this workflow—clean your sensors, plan your segments, optimize your RTK fix, and process your data with radiometric rigor—and you'll produce deliverables that stand up to engineering-grade scrutiny, flight after flight.
Ready for your own Mavic 3M? Contact our team for expert consultation.